Being a producer usually ends up in two ways – Some never seem to really improve and never get any success, and some seem to improve their beats consistently and have massive success.
Some say it’s just a matter of the time you put into it, and that success will eventually arrive as long as you’re consistent. And, while that is true, improving your beats doesn’t have to take that long.
There are certain things that the big producers do consistently that always help them improve their beats instantly.
And, I believe that with the right tools and guidance you can massively improve your beats in no time.
That’s why in this article I’ll show you the best 14 things big producers have done & still doing to improve their beats.
To make your life easier, here is a list of contents (Click The Arrow Icon To Open) –
However, just before we start, if you’re not professional at the basics of making beats (yet), and you want to get better at it, I really suggest you check out this article that I’ve written. I really put everything that you’ll ever need to make awesome beats into it.
Tip #1: Download New Quality Drum Samples
Downloading new quality samples will cause two very powerful instant improvements.
First, you’ll feel a lot more inspired to work with the new samples. Second, your beats’ sound and variation quality will tremendously improve since you’ll use both better and different samples.
There are many places you can purchase drum kits on the internet, but my favorite place to browse for drum samples is Splice.
Splice allows you to download and pay only for the samples and presets that you download and use. This way, you will 100% get an incredible return for your money.
It works like that –
You pay Splice a small monthly fee and get credits that you can use to buy samples in return. Each credit equals 1 sample.
They offer 3 plans –
- Sounds 100 (7.99$/mo) – Gives you 100 credits to spend each month
- Sounds 300 (13.99$/mo) – Gives you 300 credits to spend each month
- Sounds 600 (21.99$/mo) – Gives you 600 credits to spend each month
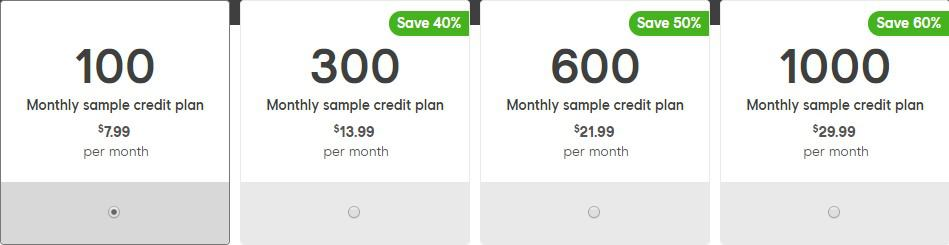
And, the best thing is – they offer a 14-day free trial period when you can download 100 premium samples – completely free.
They also offer an option to rent external third-party plugins on a monthly basis for a certain period of time, which after you’ll get a lifetime license to the plugin.
For example, you can rent RC-20 Retro Color on Splice for 4.99$ per month for 20 months, and then you won’t need to pay anymore and get a full-time license.
It’s basically like a payment plan that you can cancel anytime.
Get Your 100 Free Favorite Samples!
Tip #2: Download New Quality Beat Ready Loops
In the end, the drums of a beat only make 50% of the awesomeness of it. So, no matter how amazing your drums are, your beats won’t ever be awesome if your loops aren’t FIRE.
Moreover, downloading new loops will give you a ton of instant inspiration.
But, not all loops are going to do so. I always try to find loops which have both an incredible melodic/rhythmic idea and an awesome mix ready sound. Plus, for me it’s a must to have the stems of the loop so I can make variations and keep the whole beat interesting.
The best places I like to get loops from are YouTube, Splice, and Loopcloud. Each one of them has its own pros and cons, but overall they’re all amazing.
Splice and Loopcloud both offer a monthly subscription plan in exchange for credits, and a huge library of amazing mix ready loops. But, the problem is that most of the time you won’t be able to get the stems of them.
Most of the time you’ll have to either form a custom loop of your own out of multiple loops there, or settle for the entire loop without getting the stems.
YouTube is great for this matter, however to be honest, it’s a little hard to find truly great loops in there. Most of the time they’ll either have a great idea but sound awful, or sound amazing but have a boring idea.
That’s why I’ve decided to make a loopkit that only has loops with an amazing melodic idea, that are completely mix ready, and that contain all the stems for all of the loops in it.
Have a listen to it here –
Go to the Breeze Loopkit product page
Tip #3: Use Sidechain & Equalization To Mix Your Kick & 808 Correctly
This is probably the most important & most effective tip out of all the tips in this list.
Getting a balanced sound out of your kick and 808 is the number 1 thing that separates professional producers from amateurs. And while it does take some practice, it’s really not that hard to achieve.
It usually takes three simple actions – leveling, sidechaining, and equalizing.
Step #1: Level The Kick & 808 Correctly
The way I like to level my kick & 808 is to lower the volume of both of them until I can’t hear them, then slowly raise the volume of the 808 until I feel it’s balanced with the mix, and then raise the volume of the kick until I feel it’s balanced with both the 808 and the whole mix.
Step #2: Sidechain Your 808
First of all, for those of you who don’t know What Sidechain Compression Is –
Sidechain Compression is a production technique that allows you to decrease the volume of one element when another element comes in.
It works just like a regular compressor except for one thing.
Sidechain Compression uses an external signal to trigger the compression (instead of the threshold that a standard compressor uses).
You can use sidechain to decrease the volume of the 808 every time that the kick comes in.
This way, you can make room for your kick to be punchy and cut through the mix.
Step #3: Equalize Them Both
Equalization is the part where you add clarity and make everything sound clear.
Think of your mix as a box that contains three boxes – the low-end box, the mid-range box, and the high-end box.
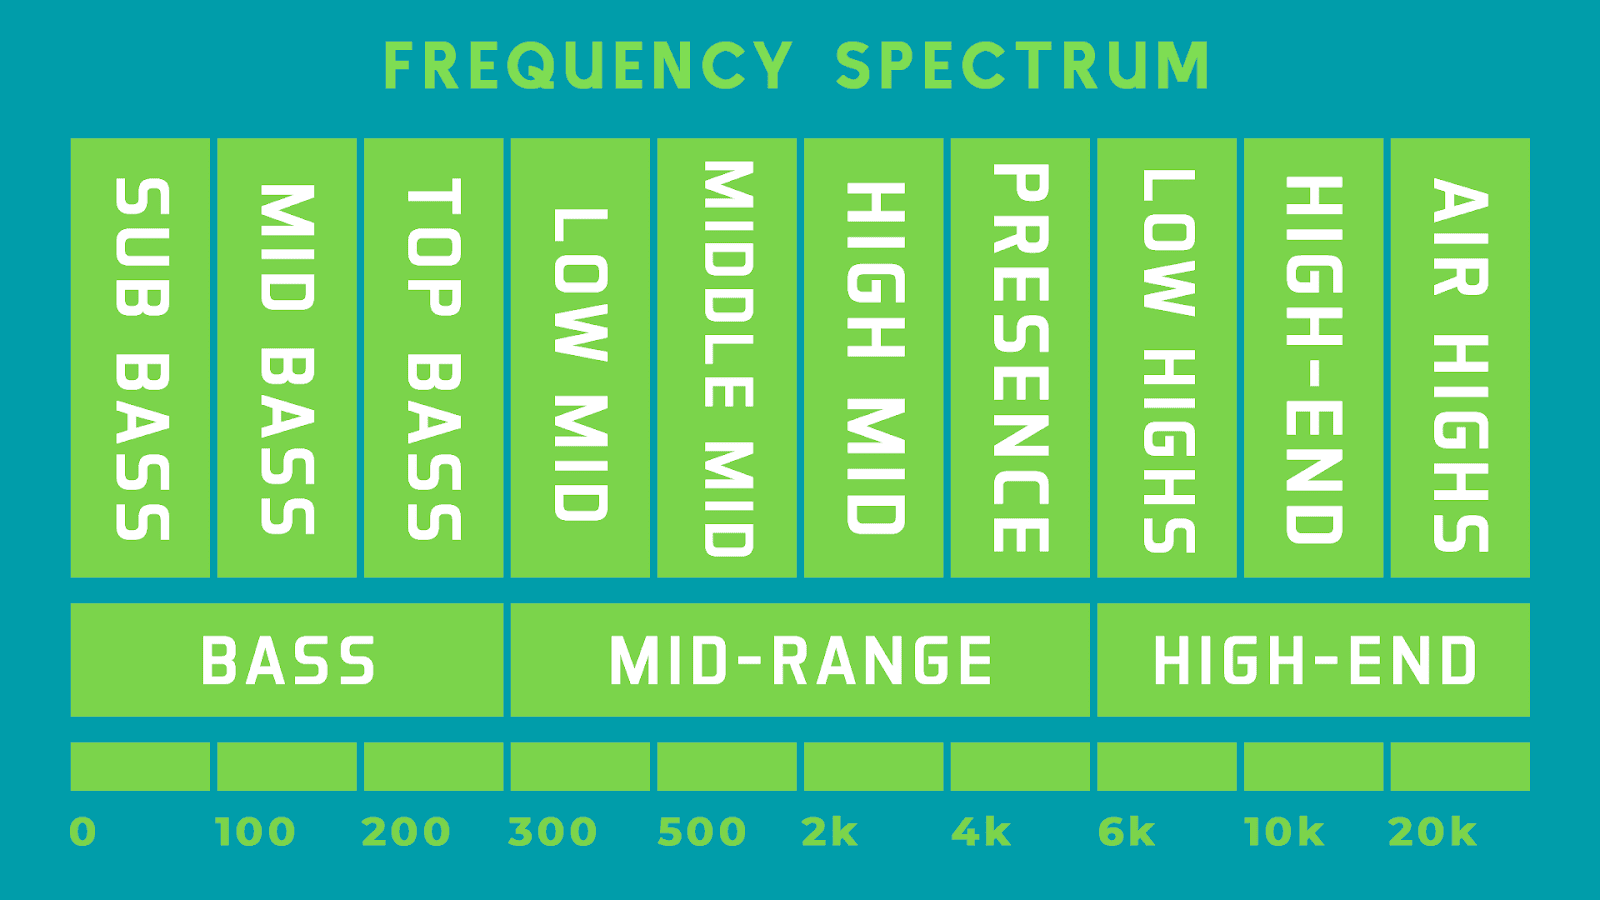
Since each box has limited space – you have to make sure that each element you add has enough space to get in.
In our case – we have to make sure that the kick and the bass have enough space – especially in the low-end box.
We can do that with three simple steps.
- Decide what the main element is – Every song that you’ll hear eventually has either the 808 or the kick as the low-end ruler.
Both of these elements can do a great job as a ruler, but in the end, only one can do it.
The way you equalize will shift dramatically according to this decision. - Equalize the low-end – Since we have limited space only for the kick and the 808 to fit in together, we have to make sure that each one of them “gives up” the dominance in at least one frequency range.
With that said, in order to make them give up the dominance, you have to decrease the volume of certain frequencies.
When equalizing the main element, try to find its weakest frequency areas. These areas will be the best areas for the other element to pop.
But, be careful when you do that because reducing the low-end too much can make the kick thin.
Another thing I recommend is high passing the kick’s low-end up to the frequency that represents the first octave of your scale note.
To find out what’s the frequency that represents the scale of your song, take a look at this table.
| Note | Frequency (Hz) |
|---|---|
| G2 | 98.00 |
| G#2/Ab2 | 103.83 |
| A2 | 110.00 |
| A#2/Bb2 | 116.54 |
| B2 | 123.47 |
| C3 | 130.81 |
| C#3/Db3 | 138.59 |
| D3 | 146.83 |
| D#3/Eb3 | 155.56 |
| E3 | 164.81 |
| F3 | 174.61 |
| F#3/Gb3 | 185.00 |
| G3 | 196.00 |
3. Equalize the high-end – When making Trap&HipHop, you want the kick to be punchy, and cut through the mix, but you also don’t want it to be too loud and create muddiness or take control over the bass.
The solution – boost the high-end of the kick.
Usually, a 3dB – 6dB to 9kHz – 15kHz will be perfect, but don’t be afraid to make even bigger/smaller boosts or not to boost at all.
As long as you know what and why you’re doing it, it’s completely fine.
Tip #4: Make Your Kick & 808 Completely Mono
Have you ever heard a song where the low-end sounds great on headphones, but sounds weird & messy on actual speakers and just horrible on cars?
If you have, the reason for that was that the kick/808 were not set to mono making the track anything but mono-compatible.
Traditionally, the kick & 808 shouldn’t be panned or have any width at all since they contain mainly low frequencies.
Low frequencies aren’t directional, so we can’t really understand the direction they’re coming from. Therefore, there is no point in panning them or making them stereo.
Moreover, when you make something wider, you push it more towards the back of the mix instead of the front.
And usually, you want the kick & 808 to be centered, and upfront.
To make your kick & 808 mono on FL Studio –
- Open the channel rack and click on the kick’s channel
- Click CTRL + L to link it to an empty channel on the mixer if you haven’t already done so
- Turn the bottom wheel all the way to the right
If you struggle with making your beats sound good on mono/on cars try reading the article I’ve written “7 Tips For Mono Compatibility – That Actually Work!”
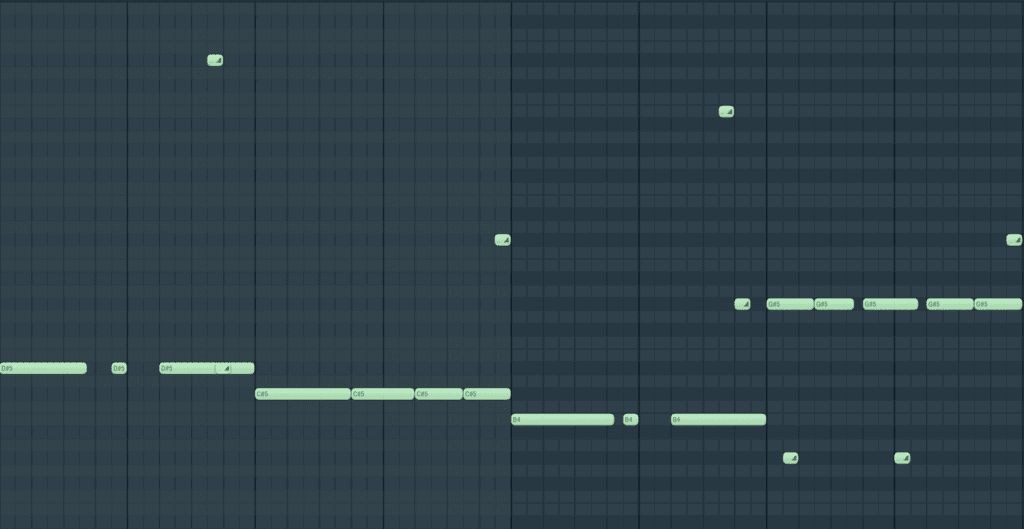
Tip #5: Start Including 808 Fills With High Octaves
Have you ever felt like your beats were a little bit boring, and looked for ways to spice them up? If you’re a normal beatmaker, I guess you have.
But, don’t worry! There’s a great way to spice your beats up immediately. All you’ll have to do is to spice up your 808 by adding more fills with higher octaves.
Those fills might be slides, rolls, reverse rolls, and even one high note once in a while.
Those high notes are unpredictable. Therefore, they will break the tonal balance for a brief moment, which will make your 808 and your entire beat a lot more interesting.
Have a look at this example –
Tip #6: Configure & Get To Know Your DAW’s Shortcuts
While this is something that will allow you to make a lot more beats overall, it will also improve each one of them as well since it will help you minimize beat block.
Since our brain is a muscle, it has a certain amount of time when it will function the best – the time you’re inspired. But, as you already know inspiration only lasts for a certain amount of time.
Therefore, learning your DAW’s shortcuts can help you use the time you’re inspired entirely on producing and not on messing with your DAW.
FL Studio Shortcuts –
- Open Playlist (F5)
- Open Channel Rack (F6)
- Open Piano Roll (F7)
- Open Plugin Picker (F8)
- Open Mixer (F9)
- Highlight all notes (Ctrl + A)
- Copy/paste your selection (Ctrl + C/Ctrl + V)
- Duplicate your selection to the right (Ctrl + B)
- Duplicate your selection where you decide (Shift + Drag)
- Deselect the highlighted notes (Ctrl + D)
- Transpose selection up/down 1 octave (Ctrl + Up/Down)
- Transpose selection up/down 1 semitone (Shift + Up/Down)
- Shift selection left or right (Shift + Left/Right)
- Toggle ghost channels on or off (Alt + V)
- Link a channel to the mixer (Ctrl + L)
- Disable snap (Alt)
- Slice a note (Alt + A + Change Time Mul)
- Switch selected pattern (-/+)
- Quantization (Ctrl + Q)
- Quick Chop (Ctrl + U)
- Randomize Notes (Alt + R Turn Off Pattern Mode)
Tip #7: Watch A Live Of Your Favorite Producer
Nowadays, it’s super common among producers to record themselves producing, stream it and upload it to YouTube/IGTV.
Watching such a stream can help you work more quickly as they might share their workflow tips, make better & more special beats as you’ll understand exactly what they were doing on your favorite songs, and it will get you a ton of inspiration that will help you deal with beatblock.
To find such live streams/videos go to instagram & follow your favorite producers, and then find out if they have a YouTube channel. If they do subscribe to it.
You might be able to find such a video straight from their instagram feed or their youtube channel.
But, if you aren’t able to find any, go to youtube and search “their name” + live. It’s almost guaranteed that you’ll find something.
For example, I was able to find this is a live of Nick Mira by doing a 1 minute search on YouTube –
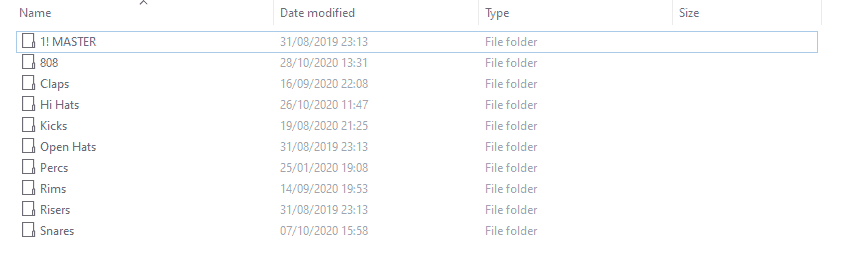
Tip #8: Download A Drum Midi Kit
Have you ever felt like you just can’t find a great idea for the HiHats, Open Hats, or even 808? If so, downloading a drum midi kit could have helped you find one instantly.
A drum midi kit contains a lot of midi files that were made especially for drums such as hihats, open hats, claps, snares, kicks, and usually 808s.
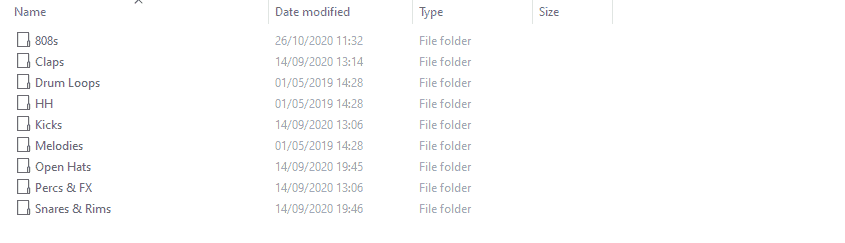
Downloading a drum midi kit can introduce you to awesome new ideas instantly, show you how professional producers make their drums, and help you produce a lot faster.
And most of the time, you’ll end up changing a lot of the midi file you’ve chosen, which is actually great because it’ll keep you unique.
The midi kit is supposed to give you ideas that you just can’t think of yet.
As you use more midi files, and produce more beats, you’ll get the hang of this and start writing amazing hi-hat rolls and 808 lines entirely by yourself.
I usually find drum midi kits from YouTube. Sometimes I see a video of a new drum midi kit that I like and download it, and sometimes one of my favorite producers such as Nick Mira might upload a drum midi kit that I love.
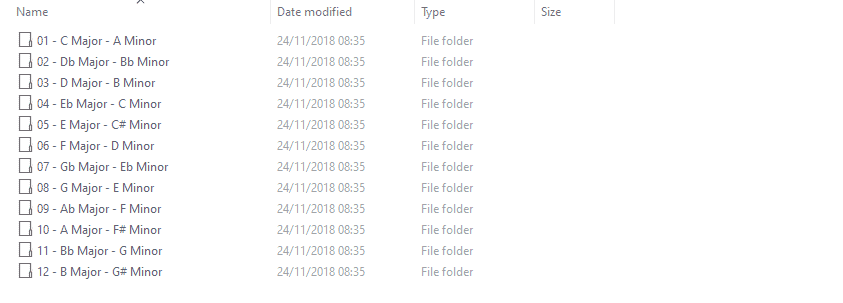
Tip #9: Download A Chord Midi Kit
This tip is going to be incredibly helpful for those of you out there who just don’t know music theory real good, or even don’t know it at all.
A chord midi kit contains a lot of midi files of either single chords by scale, or whole chord progressions by scale. Either way, it’s a super helpful thing to use.
This will only be useful for you if you make loops / any other melodic ideas. If you only make beats, without making your own loops, you won’t really be needing this.
Another thing that’s important to mention is that if you do download such a pack to make your own loops, you will need great plugins/great oneshots as well.
Otherwise, you won’t be able to make fire loops no matter how amazing your chords are. You need a combination of both.
Tip #10: Download Weird Percussions/FX And Fit Them In
Using percussion/FX samples that are a little bit weird and unusual can make you sound incredibly unique and improve your popularity among artists and other producers.
You’d actually be shocked when you find out how quick and effective this tip is.
After all, music is all about finding your special style & sound that makes you’re different from all others.
Once again, my favorite place to browse for percussion is Splice. Since they have such a massive library, I can always find exactly what I’m looking for, or even better – find something that’s perfect but I wasn’t thinking about.
Most of the time though, the percussion won’t sound great with your mix straight out of the box. Usually you’d have to either equalize them, or edit them.
How to EQ percussion correctly –
Usually to EQ them in you’d need to apply a high-pass filter and cut their low-end (0Hz – 80Hz), and apply some bell bands to remove resonating frequencies.
If you find that a little confusing, I suggest that you read this article that I’ve written – “5 Equalizer Tips That Actually Work!” Where I explained exactly how to remove resonating frequencies with an illustrated guide, and showed my other super helpful tips for using equalizers correctly.
How to edit percussion correctly –
To edit percussion correctly you’d need to learn how to work with your DAWS audio editor.
Luckily, FL Studio has a great quick audio editor that’s perfect for these situations.
To open it just click on the specific channel you want to edit in the channel rack.
Tip #11: Use High Attack Compression To Make Kick, 808, and Snares Hit Harder
Have you ever wanted to make your drums & 808s less heavy and more punchy? If you’re a normal beatmaker, I guess you have at least 100 times.
And, there’s actually a secret method all the best producers & mixing engineers use to do so.
They use a compressor with a long attack time and a medium release time so that the punchy part isn’t affected by the compressor, and all the parts after the punchy part are reduced. Then they put on a little bit of makeup gain.
This way, the punchy part is boosted, and all the other parts aren’t affected.
Let’s look at this example to understand it better –
The Original Kick –
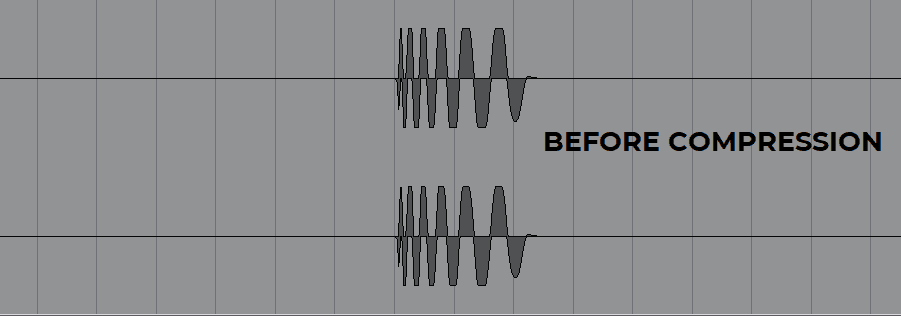
As you can see, the kick’s transient part is just as loud as the other parts, and therefore, the kick isn’t very punchy.
Kick After Compression –
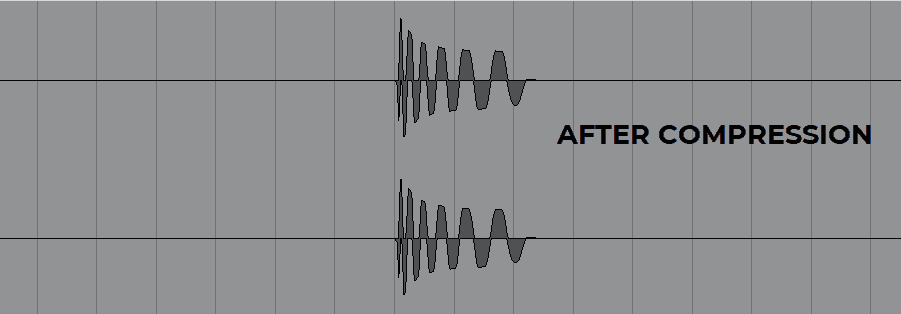
Now, the kick’s transient part is a little bit louder than the other parts of the kick, which makes it significantly punchier.
Tip #12: Use More Unusual Time Signatures
Before I start explaining the benefits of using more time signatures, it’s necessary to completely understand what it is.
As you probably already know, each song has a certain amount of beats in it, depending on its BPM (Beats Per Minute).
The time signature of a song defines the way those beats will be divided.
For example, the most common time signature, which is ¼, divides each beat into four parts.
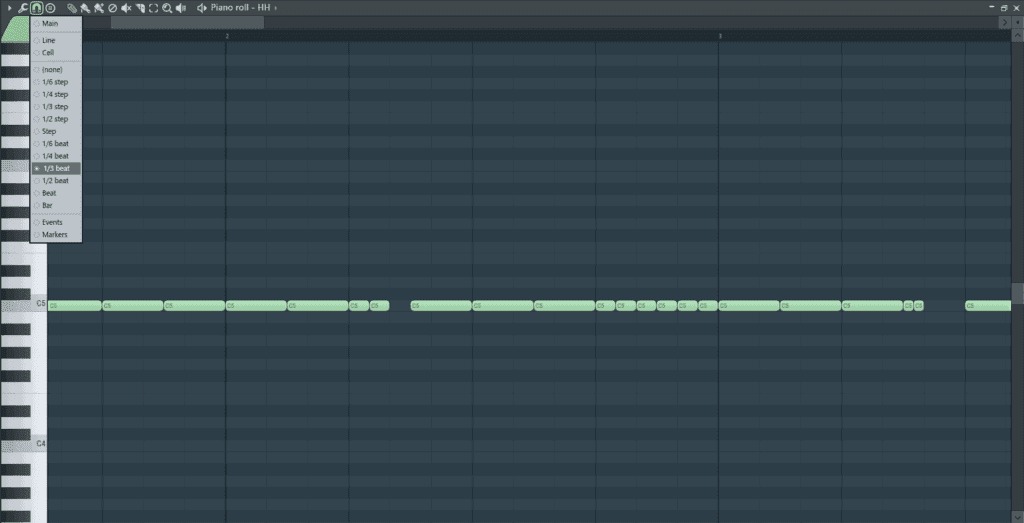
Your time signature defines the whole rhythm of your song. By using various time signatures (especially ⅓, etc..) in a single song, you can add a ton of variety, make your beats a lot more interesting, and give them a totally different bouncy vibe.
This is actually something that many producers know of but somehow tend to ignore.
Some people say they don’t use it because it’s too complicated or won’t fit their song. But, I promise you, once you get the hang of it, you won’t stop using it.
And, it’s something that all experienced producers take advantage of to make their beats stand up from the competition.
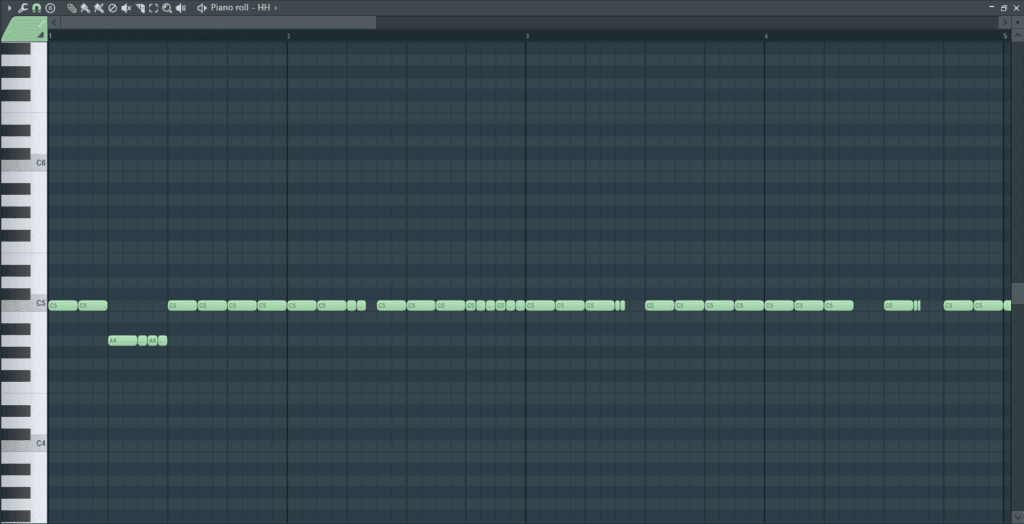
The best & most common place where producers use a ⅓ time signature is on their HiHats & 808s. Mostly on fills & rolls.
Tip #13: Use Soft Clipping & Saturation To Make Your Drums Hit Harder
Soft clipping & saturation can both help you boost the punchiness of your drums and actually boost the presence of your 808 on small speakers.
How Can Saturation Help You?
Saturation can help you whenever you want to add new frequencies to a sound. (In contrast to an equalizer that can only boost or lower existing frequencies).
Let’s see what happens when we add saturation to a single frequency generator.
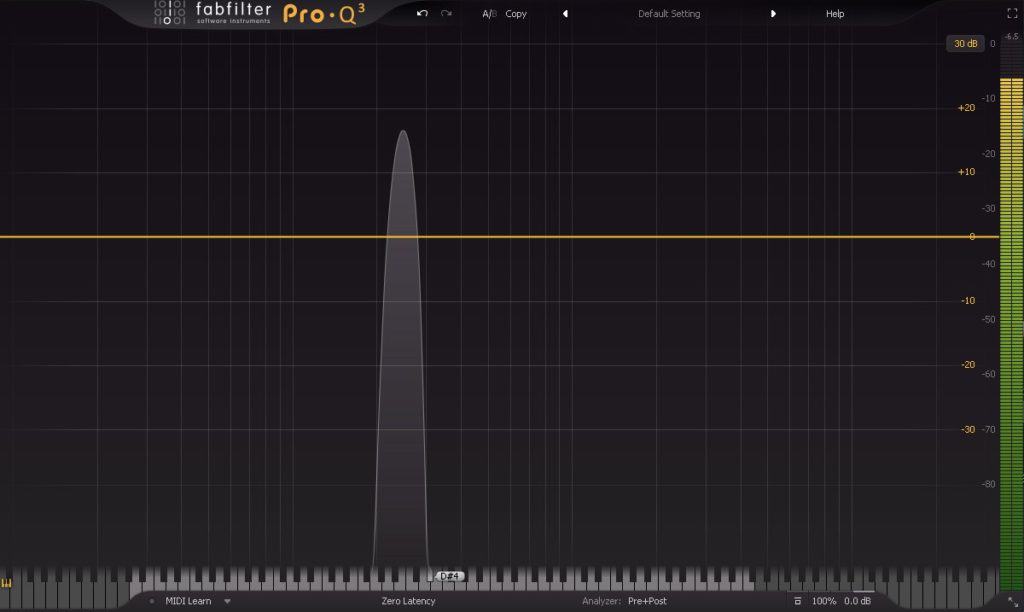
Now, let’s add saturation.
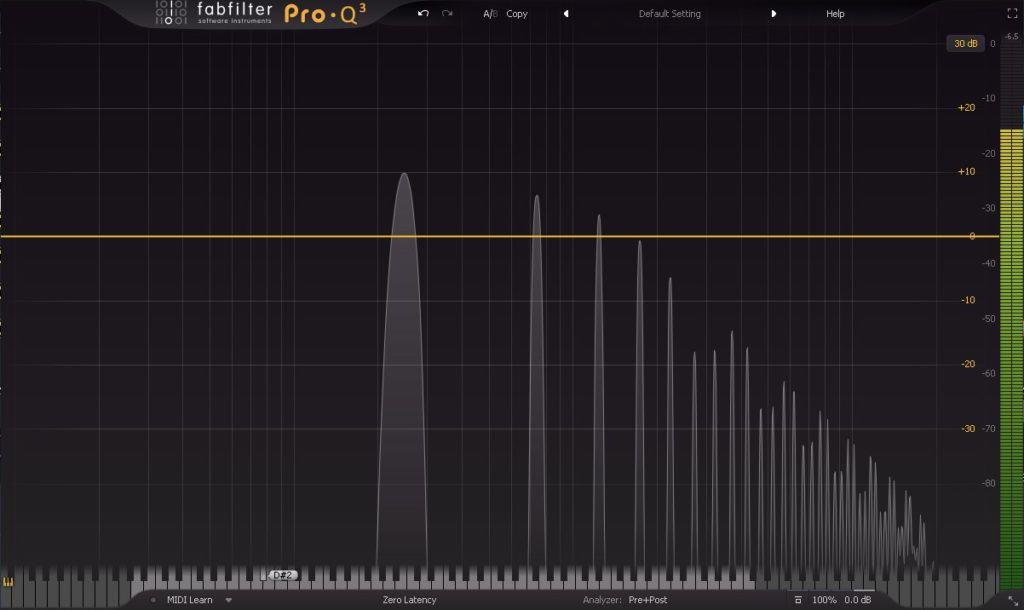
As you can see, the saturation added a bunch of new harmonic frequencies that make the sound richer.
It can really help with thin kicks and 808s by adding more mid-range and low harmonic frequencies to it, and help with kicks & 808s that aren’t bright enough by adding top-mid and high-end frequencies.
Now you may ask yourself – How can that improve the presence of my 808 on small speakers?
Well, as you may know, small speakers such as phone or laptop speakers can’t really output anything below 100Hz at all, and kind of suck at outputting any low-end as well.
Therefore, the only way to make something stand out more on small speakers is to boost its higher frequencies. For 808s it’s the 700Hz area that does the trick.
So, if you saturate the mid-range (around 250Hz – 700Hz) it’s going to add lots of harmonic frequencies around 700Hz and therefore, make your 808 a lot more prominent on small speakers.
How Can Soft-Clipping Help You?
Soft Clipping works very similarly to saturation. They both add new harmonic frequencies, and as written above, both can help you make your drums punchier.
However, there’s one major difference between them – Soft Clipping only affects the loudest parts of the audio signal. It’s basically saturation with a higher threshold.

As you can see, the threshold of saturation is so low, it allows it to affect every part of the audio. However, the threshold of the Soft Clipping only lets it affect a small part of the audio.
The Conclusion
Use saturation when you want to affect the whole sound and not just the punchy part, and soft-clipping when you want to affect just the punchy part.
Tip #14: Pan Your Drums Properly
Panning your drums and using the stereo field properly can take your beat from sounding ok to sounding professional and amazingly mixed.
So, let’s have a look at each one of the drums and see how it should be panned.
Kick & 808 – Mono
As written above, the kick & 808 are mostly not directional, therefore, there’s no reason to make them stereo.
It can only ruin your mix. So, just keep them completely mono.
Snares & Claps – Stereo/Panned/Mono –
The snare is one of the elements that is totally up to you and your song.
Usually, snares tend to be stereo, but several reasons might make you consider making them mono.
If you want to put more focus towards your snare and make it more centered, and impactful, you might want to set it to mono. The reason for that is the same for the kick – As you make something wider, you also push it back in the mix.
But, stereo simulates the sound of space. Therefore, snares do sound better in stereo.
That’s why it’s important to A/B test this on every mix that you work on, and determine that accordingly.
My recommendation – Widen the top frequencies of the snare, and keep its low-end frequencies mono.
This way, you can keep the snare powerful and save the sound of the real space.
You can do that with a multiband stereo imager.
Percussion/Toms – Panned/Mono
Usually, toms should be sort of in the middle of the mix.
They shouldn’t be too noticeable, but they also shouldn’t be far in the back of the mix.
Now, you might be asking yourself – How can I get this balance?
There are three main ways that you can use to achieve that –
Panned Toms –
This is my favorite way to fit the toms in the mix.
Since opposed to other panned drums, the toms are focused on the low-end and mid-range and not on the high-end, you can easily fit them in the sides of the mix.
Plus, it also adds extra width to the track, so why not?
Mono Toms –
Sometimes, you would really want your toms to be dominant and upfront, and it would just make more sense to make them mono.
But, there is a big problem – when toms are set to mono, they fight with the kick and the 808.
Therefore, if you want to set your toms to mono, you’d have to highpass their low-end and make sure that they don’t hit together with the kick.
Ok, those are the 14 tips you can use today to improve your beats forever! Be sure to check out my new guitar loop kit – “BREEZE”.
I really put a lot of effort into making each loop in it as awesome as possible and made sure that all of them are beat&mix ready so you can spice up your beats instantly!


![Royalties Beat makers Get – Explained Simply [With Infographics!]](https://wealthysound.com/wp-content/uploads/2020/10/Royalties-Music-Producers-Beatmakers-Can-Get-Explained-Simply-1-768x504.png)