1. Remove Resonating Frequencies
If you don’t control them, resonating frequencies can make your mixes sound out of balance and quite annoying to listen to.
So to fix and remove resonating frequencies from your sound –
here is what you need to do:

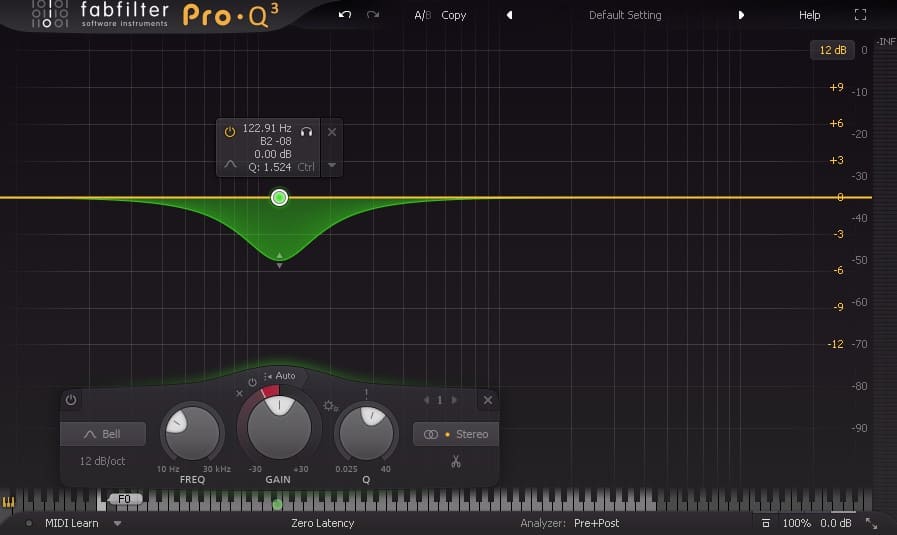
You need to make a bell band with a really high bandwidth, and a really high gain (about +10dB).
After you have created it, go over your frequencies and try to find the resonating frequency that’s bothering you.
It would really help to take a moment and decide whether this frequency sounds fat and low – (if so its probably around 200hz-500hz), or if it sounds sort of like a whistle – (if so its probably around 500hz-4000hz), or if it sounds kind of like a sharp air – (if so it’s probably around 4000hz-20000hz).
It’s important not to over eq these frequencies because they still have an essential role in your mix, so if you reduce them too much, you might get a dead-sounding mix.
If you’re still having a hard time finding the right frequencies to eq, I highly recommend that you start using these excellent ear training methods of “TrainYourEars”.
They will let you take a self suited training series that will make a massive change to your hearing and production skills.
2. Use dynamic equalizers
A dynamic equalizer is the combination of an equalizer and the basics of the compressor.
It allows you to reduce or boost frequencies just like a standard equalizer, but it also allows you to decide when to do it in a way that’s similar to the compressor’s threshold.
The reason you may need to use a dynamic equalizer is unstable frequencies.
For example, you might have a vocal track that includes high notes and low notes, and as a result, has loud low-mid frequencies in some notes and doesn’t have them in the others.
An excellent solution for a situation like that is a dynamic equalizer.
here is what you need to do:
All you need to do is to set a band to the problematic frequency and set the dynamic range to a negative value that sounds balanced.
Listen to the result in your mix and tweak it more if needed.
3. The whole is more important than the parts
This is true not just for equalizers.
Don’t forget that your final goal is to make your mix sound great.
Therefore, your final choices must be made while hearing how your current track interacts with other tracks in your mix.
To do that, you’ll have to bypass the solo button. Because, whenever you solo a track, you remove it from the context of your mix.
Don’t avoid the solo button completely
It’s ok to use the solo button when you need it, its there for a reason.
For example, when I remove resonating frequencies, I do it with the solo mode activated.
But, when I make my final decisions for a track, I do it in the context of the whole mix.
4. Make intentional choices
Even if you know how to use an equalizer correctly, you don’t have to always use it. In fact, a lot of the times, you won’t have to eq your track at all.
So, before you automatically load an equalizer on every channel in your mix, listen to it, and find out if you hear anything that needs to be fixed.
In the end, you should always trust your ears and let them decide.
The flip side of this (that’s not better) is avoiding using the equalizer aggressively.
Like I said above, in the end, the only thing you should trust and count on is your ears. So if you find it necessary to make aggressive boosts or cuts, DO IT.
Bottom line, do anything that you find necessary, As long as you know why you’re doing it.

5. Make space for everything
The best relationship advice I can give you is – “If you love them and they need space, give it to them”.
This advice is right for the instruments in your mix, just as it is for humans.
You can think of your mix like a box. If your box is full and you want to put something new in, you have to take something else out.
In other words, if you want to make space for every instrument in your mix, you have to remove all of the frequencies that you don’t need from every instrument.
For example, when I try to mix a sub-bass, a muted guitar, and a piano, I mostly keep the sub-bass around (30hz-400hz), the muted guitar around (5000hz – 20khz), and the piano around (400hz – 15khz).
You don’t always have to do these rough cuts, but it really helps to keep this principal in your workflow, so whenever your mix sounds muddy, you know what to do.
If You Want To Master The Equalizer
You Should See This Course

In this class you’ll learn:
- How To Effectively EQ Your Music to Create a Balanced and Professional Song
- Instantly Improve Your Mixing Workflow
- Be Confident Knowing Your EQ Decisions are Actually Helping Your Songs Rather than Damage It
- How an EQ Works, the Filter Types, and When to Use These Different Filter Types
- Creative Uses of EQ and Real World Examples to Use Them
This course includes:
- 3 hours on-demand video
- Full lifetime access
- Access on mobile and TV
- Certificate of Completion
One of many satisfied customers:
“As someone relatively new to music mixing, this course has been immensely helpful. It gives you the basics and a few tips and tricks to start out your journey.”