So, you think of this incredible idea for your background vocals, and you put the effort in and record it, only to find out that they just don’t fit into the mix.
Usually, the reason for this is either a lack of equalization or a bad equalization.
Therefore, in this article, I’ll show you exactly how to EQ your background vocals in 5 easy steps, so you can make them fit into your mix and sound as professional, and as amazing as possible.
And, at the end of the article, I’ll talk about 3 really important principles that will tremendously help you with avoiding mistakes and equalizing correctly.
Step #1: Determine The Goal Of The Backing Vocals
The first step you should take when it comes to EQing anything is to determine what the goal of this element is in the mix.
I found that there are usually three main goals when it comes to backing vocals –
- Enrich the low-end – If your main vocals sound thin, or not full as you’d like them to be you can use backing vocals to thicken them up. However, there are also ways to thicken up your main vocals without adding backing vocals.
For example, in the verse, you may want to keep your main vocals solo, but still, make them sound thick.
If this ever happened to you I highly suggest that you read this article that I’ve written where I guide you step by step on how to fix thin vocals without adding backing vocals. - Widen The Vocals – If you want a part of your song to sound wider, and more powerful, you can record two tracks of backing vocals and pan each track to another side that way each side is a little different which creates a huge width, and a super powerful sound.
Professional vocalists and producers use this exact technique almost every time they want their vocals to sound wide. - Fill Empty Spaces – Even though this type of backing vocals are usually called adlibs, they can still interfere with the main vocals, and they usually get in the back, not the front.
Therefore, I still consider them to be backing vocals.
This type of backing vocals has not always been that popular, however, nowadays it seems like there aren’t any songs that don’t contain some form of it.
This purpose will have the most significant effect on how you EQ your backing vocals.
For example, suppose your backing vocals are supposed to thicken up your vocals, you’d want to keep most of their low-end, and maybe even boost it sometimes.
However, if your backing vocals are supposed to widen the vocals, you would want to reduce most of their low-end, and boost their mid-range to make space for the main vocals’ low-end, and emphasize the width of the vocals.
Step #2: EQ Out Unnecessary Frequencies
Each and every element in your song will have some unnecessary frequencies.
When I say unnecessary frequencies, I mean the frequencies that don’t improve the sound of the mix of frequencies that don’t add anything to the element’s sound.
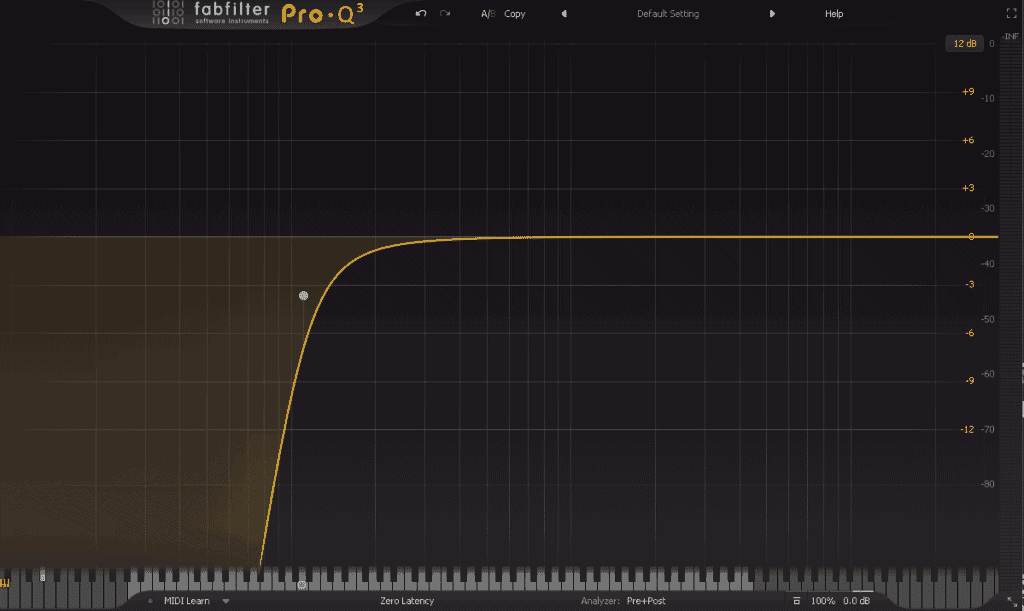
Unnecessary frequencies of vocals will usually be at 0Hz – 80Hz.
Usually, anything below 80Hz is just boomy noises or unwanted rumble that can completely ruin the balance of your vocals and interfere with your compressor. Therefore, it’s better if you just remove them.
This way you can make more room for your sub-bass to come in, and make sure that your vocals stay balanced.
The way I determine where’s the perfect way to cut is by creating a highpass filter, raising it while listening in context with the mix, and stopping when I hear it’s thinning up the backing vocals.
If you use this way you’ll always find that perfect sweet spot.
Step #3: Remove Resonating Frequencies
Pretty much every recording you’ll ever make will have some resonating frequencies. And they can easily ruin amazing records. So It’s important to treat and remove them correctly.
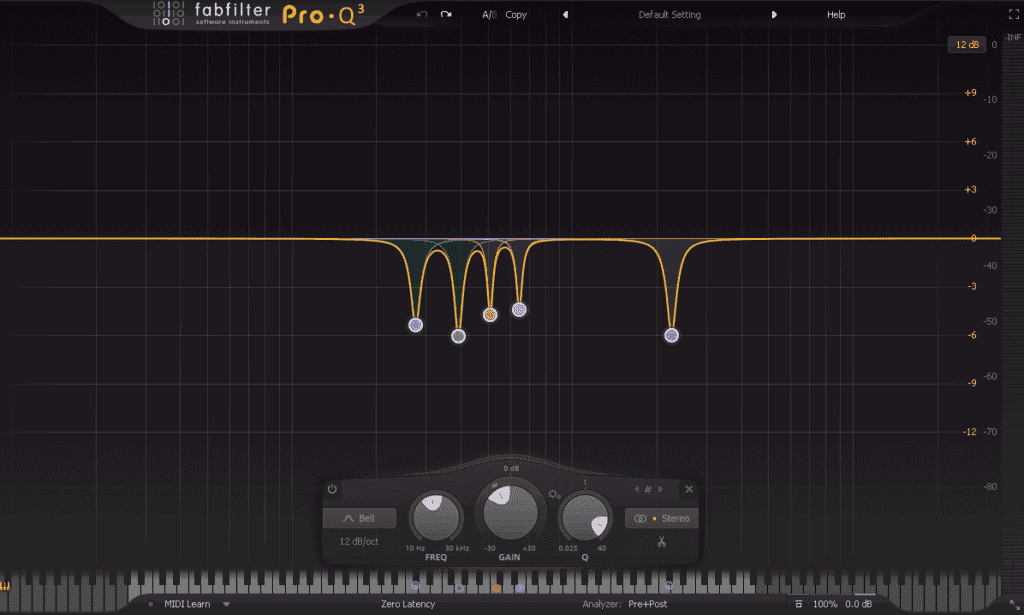
To do so, make a bell band with a really narrow Q (about 20), and a high gain (at least +10dB).
Then, go over the frequency spectrum and try to find the resonating frequency that’s bothering you.
It would help to take a moment and decide what this frequency sounds like.
If it sounds like a whistle – (150Hz-600Hz), if it sounds harsh and thin – (600Hz-4kHz), if it sounds like sharp air – (4kHz-20kHz).
However, the vast majority of resonating frequencies will be at the 300Hz – 700Hz.
If you’re still having a hard time finding the right frequencies to eq, I highly recommend that you start using these excellent ear training methods of “TrainYourEars”.
They will let you take a self suited training series that will make a massive change to your hearing and mixing skills.
After you recognize a resonating frequency use a bell band with a narrow Q and reduce it. Usually, 3dB – 6dB will be perfect as you don’t want to reduce them too much since it will create an unnatural sound.
Step #4: Balance The Mid-Range With The Main Vocals

Balancing the mid-range of your backing vocals is actually a relatively simple thing to do if you know the purpose of them.
It’s important to mention that there are no rules here, and a thing that sounds great on one mix might sound terrible on another.
Therefore, you should always trust your ears more than anything. If something sounds good to you, so be it. Even if it doesn’t make any sense.
However, there are general guidelines and certain things that each frequency group is responsible for.
Generally, if the background vocals are supposed to thicken up the vocals, they should have a strong low-mid and a quiet upper mid-range.
If the background vocals are supposed to widen the vocals, they should have a quiet low-mid and a strong upper-mid.
And, if the background vocals are supposed to fill empty spaces, they should be completely balanced compared to the mix, not the main vocals.
The Mid-Range Frequencies (500Hz – 2kHz)
Boosting these frequencies can give your vocals extra crunchiness. You should boost them if you feel like the vocals lack some power.
But notice that you should be extra careful when boosting these frequencies.
The human ear is super sensitive to these frequencies, so only boost them if you have to.
The Upper Mid-Range Frequencies (2kHz – 4kHz)
The human hearing is mainly centered at the upper midrange frequencies, so it’s crucial that you balance those correctly.
These frequencies are mostly responsible for the attack, but they can also add presence when they’re boosted.
Boosting these frequencies can make your vocals stand out a lot more, but if you boost them too much, they can also cause listening exhaustion.
Step #5: Balance The High-End With The Main Vocals
Just like the mid-range, there are no rules here, but there are things each frequency group is responsible for.
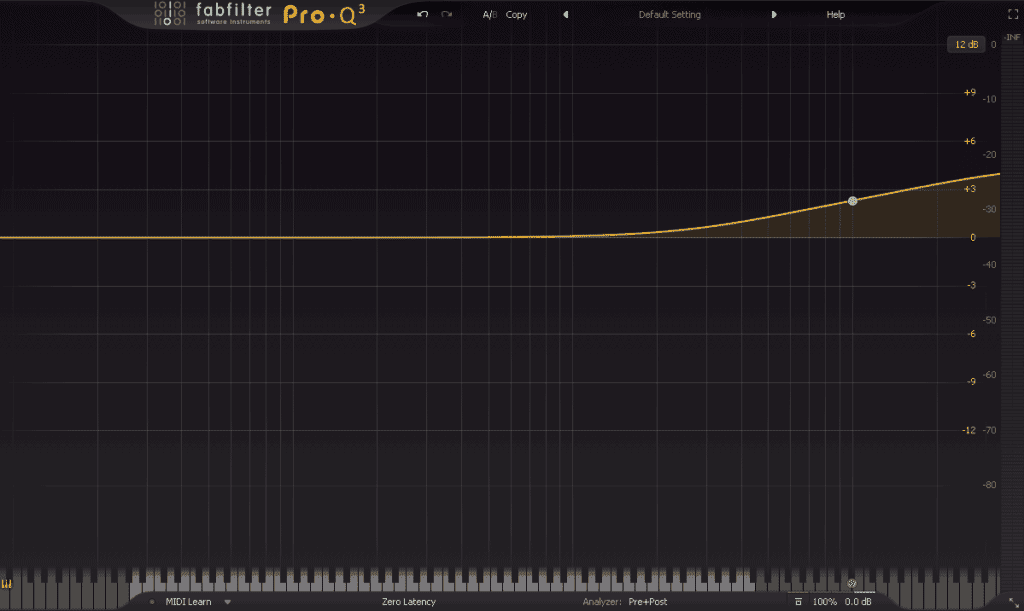
The Presence Frequencies (4kHz – 8kHz)
These frequencies are responsible for the clarity of the vocals. These are also the frequencies that most home stereos center their treble control on.
If you want to make your vocals stand out a bit more, you should try and boost these frequencies.
Start by adding a wide boost of about 2-3dB and fine-tune it from there.
The Brilliance Frequencies (8kHz – 20kHz)
These frequencies are responsible for the sparkle and air sound of the vocals.
If you want to increase the spark of the vocals, boost around (12kHz-15kHz). Boosting these frequencies will make your vocals pop instantly.
However, if you boost them too much, they might make your vocals a bit harsh, so be cautious when boosting them. Usually, a 2dB-4dB boost is a perfect amount.
Principles You Should Know
Principle #1: Make Things Right From The Beginning
Before you start recording, take a minute to think about how you want the final vocals to sound like, and plan things accordingly.
For example, if you want the vocals to be bright and clear, use a diaphragm condenser microphone, and get a bit further from the microphone (5-10 inches).
But, if you want a warm and close sound, use a dynamic microphone, get closer to the microphone (2-5 inches).
Principle #2: Avoid The Solo Button
In the end, the most important thing is the context of the vocals with the song.
And even though the changes you make when on the vocals sound great on solo, it doesn’t necessarily mean that they will sound good in the mix. Therefore, try to avoid it as much as you can.
The only time you should listen to the vocals in solo is when you try to remove resonating frequencies.
Principle #3: Always Cut Before You Boost
When you’re cutting frequencies, you’re reshaping the vocals, and you clear some space.
After you remove frequencies that were too strong, you make room for the other frequencies to pop, and you may find out that you don’t need to boost anything at all.

![How To Mix Your Beats In 6 Steps! [With Examples]](https://wealthysound.com/wp-content/uploads/2020/11/How-To-Mix-Your-Beats-In-6-Easy-Steps-Thumbnail-768x504.png)


