
So, you want to record yourself or a friend playing that awesome hook, or make that great loop that you have in mind, however, no matter what you do you seem to not be able to achieve that level of sound quality that you want.
You try all those “master” mixing tips that waste a few hours of your life, or maybe even buy new equipment such as a better mic, etc, but to no success.
Well, the harsh truth is that it’s hard to write a good tutorial for mixing guitars, especially if you don’t do it on a regular basis.
That’s why in this tutorial I’m going to explain everything and only what you have to know in order to mix acoustic guitars, in the shortest, most straightforward way possible.
For your convenience, here’s a table of contents that’ll help you navigate through the article:
At the end of the article, I’ll also tell you the most important secret that’s probably holding you back from achieving professional-sounding recordings.
Before we start, here’s the Before and After of today’s article:
Step #1: Time Sync All The Recordings
The first & the most important step when it comes to mixing any recording is to make sure that everything is in sync.
Now, when it comes to vocals this isn’t much of an issue, however, when it comes to guitar recordings you’re going to need to try a little harder and sync everything yourself.
I use Cubase to do that since they truly have the best audio editing tools, in my opinion, however, any DAW with stretching, cutting, and moving audio features will do.
This is how it looks like in Cubase:
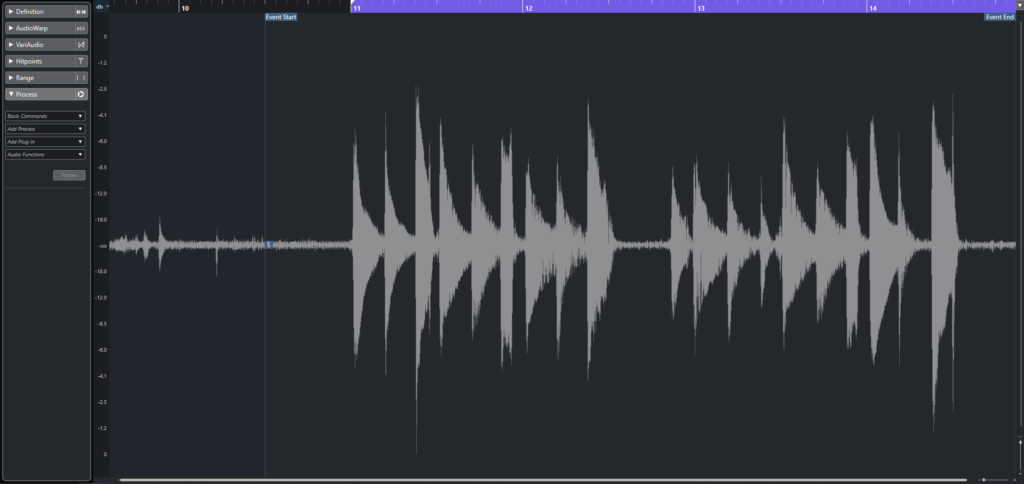
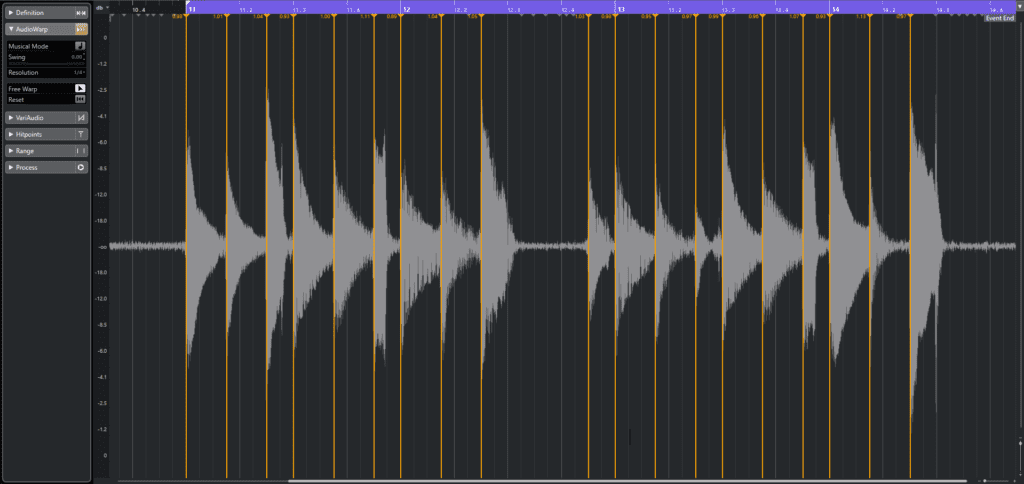
See how easy that is? All you do is drag the various recording points to match the grid.
Other DAWs like FL Studio, claim to have the same capabilities, and even though you may have to sweat for it a little more, you’ll still be able to achieve the same. Here’s how to do that in FL Studio:
Step #2: Clean All The Unnecessary Noises
The next step will be to completely clean your recording from all of the unnecessary noises it may have.
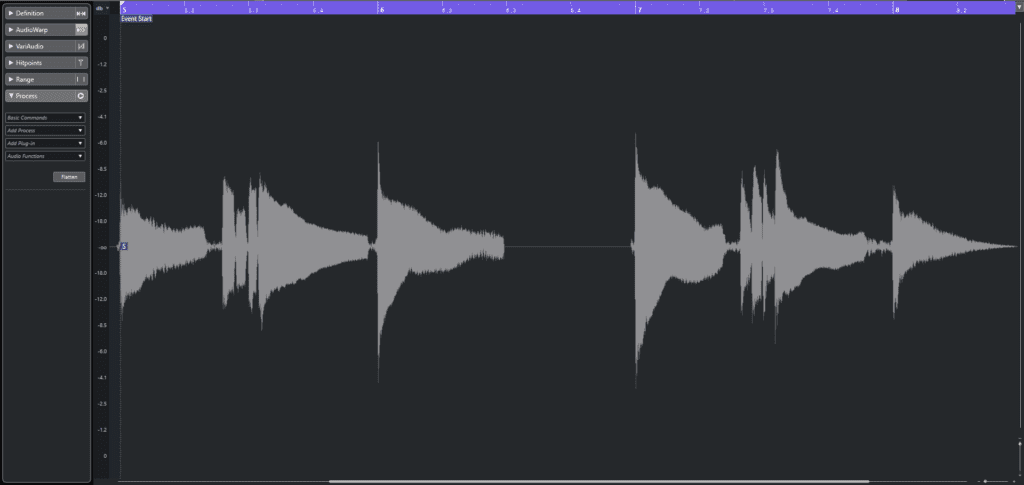
When I say unnecessary I mean what you think is unnecessary. Let’s have a look at an example:
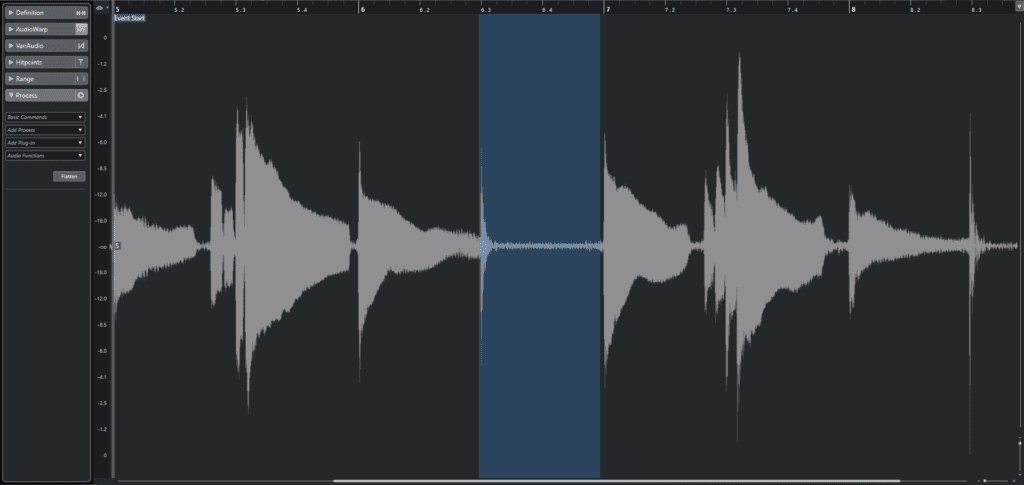
See that thing I marked? That’s the tap you can hear in the recording. Usually, I would want to keep taps like this as they’re usually part of the rhythm and groove of the recording.
However, in this case, this tap doesn’t help the groove/rhythm at all, and therefore, I decided to remove it as well as all the other noises I’ve found to be unnecessary like the background noises, other taps, etc.
Another thing I’ve done is lower the gain of certain parts a little bit so the track is more balanced overall (we’ll talk about this more in the next step when we talk about compression).
Step #3: EQ & Compress Each Recording To Fit Its Spot
So, you’ve synchronized everything to the grid and cleaned all the recordings and everything sounds a lot better now! However, it still doesn’t sound quite there yet.
It sounds like there’s a missing touch in the basic sound of the recordings. That’s where Equalization and compression come along.
These are the steps I usually take for EQing:
- Cut unnecessary frequencies (0Hz – 80Hz)
- Balance The Low End (80Hz – 300Hz)
- Balance The Low & Middle Mid Frequencies (300Hz – 2kHz)
- Balance The High Mids (2kHz – 6kHz)
- Balance The High End (6kHz – 20kHz)
- Remove Resonating Frequencies (400Hz – 2.5kHz)
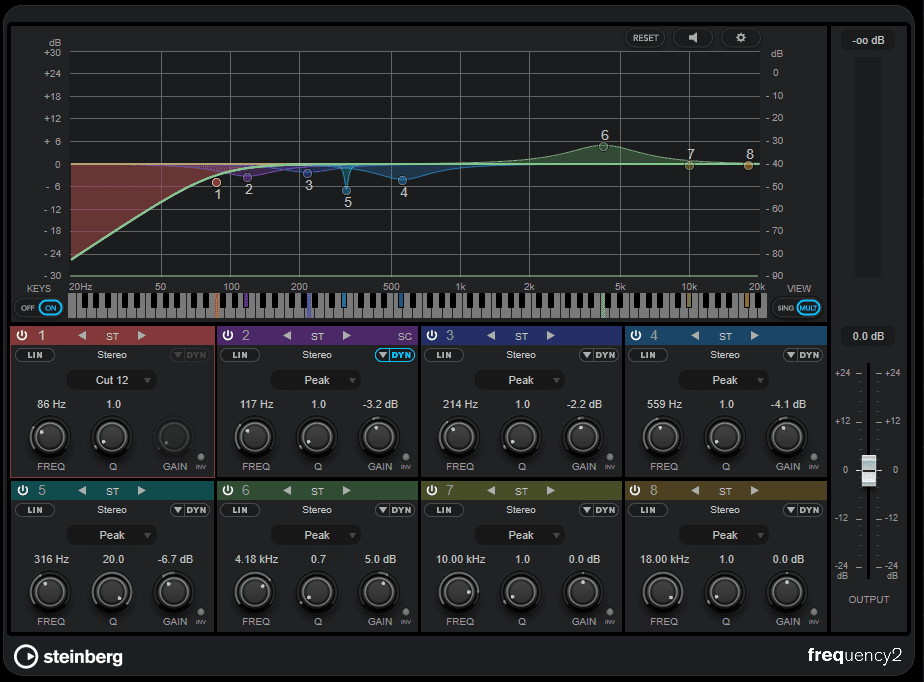
Of course, every layer will have its separate equalization, depending on its needs.
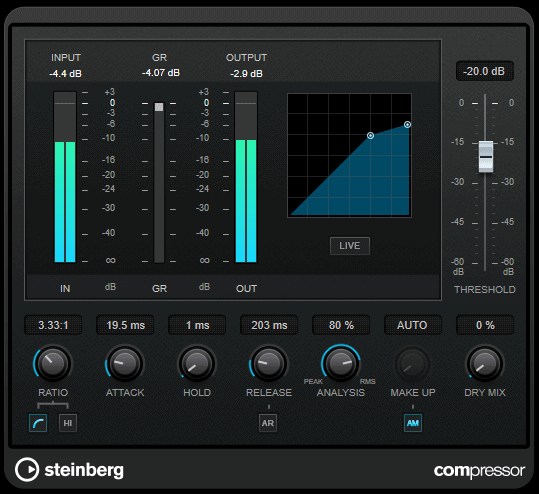
These are the steps I usually take for compression:
- Set the threshold until you see that the places that need to be reduced are effected, then push it back a little.
- Set the ratio until I hear that the gain is close to being balanced.
- Set the attack time to a value that gives your desired punchiness.
- Set the release time until you hear everything is balanced.
- Re-tweak if necessary to your liking.
Recording Before EQ & Compression:
I’ve also made a simple beat for you to hear it in a mix.
Recording After EQ & Compression:
Do you hear how everything is just more balanced and clear? Hear it with the beat as well:
So, using an Equalizer & Compressor correctly can make or break your recordings, so it’s crucial that you do it correctly, however, it’s also important to know something else.
They aren’t always necessary!
When I was just starting out, I used to put an EQ & Compressor on as a reflex, and most of the time I really shouldn’t have. You should only use EQ and Compression when you hear a problem that needs to be fixed.
For example, you may hear that a certain guitar recording is too dark and is missing high frequencies, or that a certain track’s gain is unstable and is changing more than you’d like it to.
Bottom line, you have to understand that EQ, Compression & all the other plugins you may use are just tools that are supposed to support your vision. If you don’t have a clear vision, then don’t use them.
What I would do instead is try to listen to reference tracks (which are professional guitar recordings that have the sound you desire), and try to notice the differences between your recording and the reference track.
Just by doing this you’ll learn so much and take your ears to the next level.
Step #4: Add Reverb & Delay Where Necessary
So, now we got a really good basic sound going on. That’s great! Now it’s time to make sure that everything is placed correctly in space and around the stereo field.
Therefore, that’s what this step and the next one are about.
In this step, we’ll add reverb & delay to all the elements (if needed), so they blend together as well as possible.
Generally, you know that you should add reverb to an element if you want to push it backward in the mix.
For the reverb, I used “ValhallaSupermassive” which is absolutely free! Get it here.
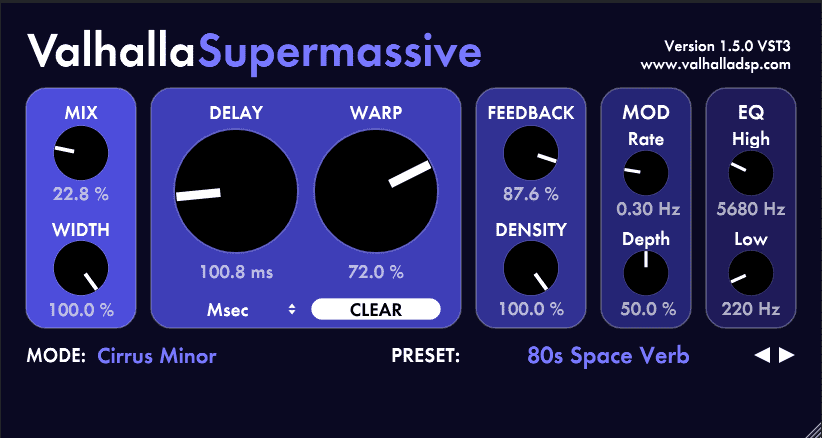
However, you can use whichever plugin you’d like.
In fact, I’ve written a full article about the best reverb plugins for vocals, where I’ve covered all the features and the pros and cons of each plugin.
And, even though it was originally written for vocal reverbs, it truly covers the best plugins in the market overall.
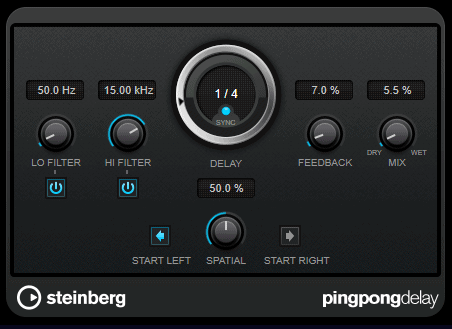
For the delays I’ve used Steinberg’s PingPong Delay which comes with my DAW and is absolutely fantastic.
Step #5: Pan The Guitars Across The Stereo Field
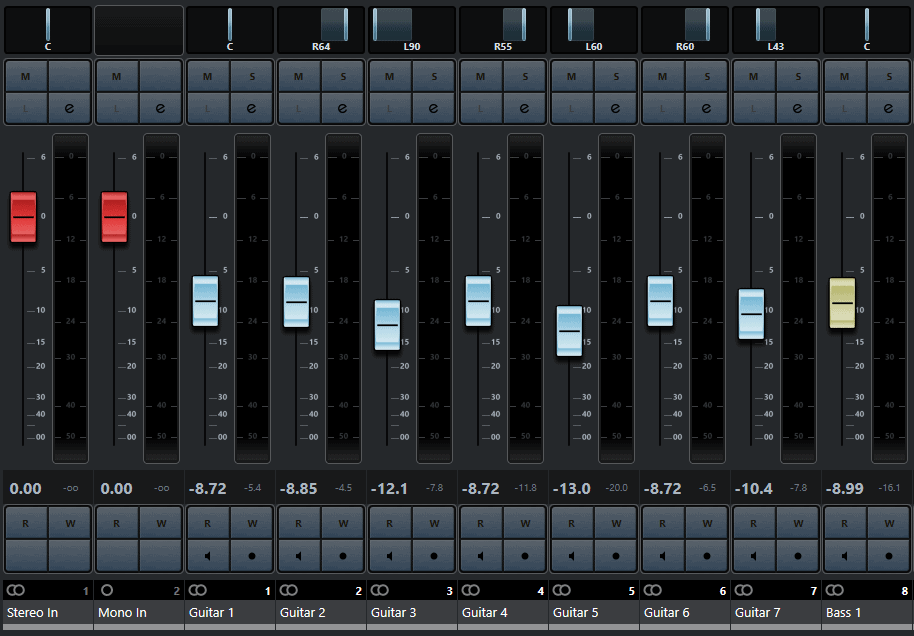
This step is incredibly important as it directly affects how your guitar is spread around the stereo field.
There are two main methods when it comes to panning, the first is to pan everything either 100% to the left or 100% to the right. Honestly, I don’t like to use this technique when mixing acoustic guitars since it usually feels a little too much.
What I like to do instead is pan the main element of the guitar to be completely centered (stereo/mono is your choice), and then pan each of the other elements to be around 50% left/right.
However, if I’m dealing with strumming, I usually like to make it stereo by duplicating it twice, delaying each channel a little bit (10ms-50ms), and panning one to the left and one to the right.
This creates an illusion of two guitars playing and is guaranteed to make a track thicker and richer.
How To Setup The Mics Correctly

Now it’s time for the most important thing which is actually something you do before you start mixing. Now we’ll talk all about setting your mics correctly, so the recording comes out with the best sound possible.
There are a couple of steps that will really determine the sound of the recording and help you achieve the level of quality recordings that you want:
Step #1: Use the best recording room you can find
Picking the right recording room will save you a whole lot of time mixing and get you better results than you’ve ever imagined.
Obviously, if it is an option for you, recording in an acoustically treated room would be best.
However, if it’s not an option for you don’t worry! There are still many things you can do to get a great sound.
If you can’t find a studio I’d recommend finding a room with a lot of furniture & clothes, which is preferably around the ratio 4×3 (width and height wise).
A squared room isn’t recommended since it usually creates a lot of phase cancellation issues.
Step #2: Find & Record in the best placement in the room
This is something lots of people forget to take care of, but it’s a significant key for a great recording.
Every room has its own “sweet spot”, and it would be best if you record in this exact spot.
There are two guidelines for positioning microphones:
- Don’t place the microphone in the exact center of the room – There is a buildup of standing waves that will sabotage your recording.
- Stay away from walls or reflective surfaces – There will be lots of reflections coming to your microphone.
- Don’t ever record near corners – The corners are the place where all the bass and muddiness tends to come to, so it’s best if you stay away from there.
The best spot to position your mic is usually slightly off the exact center of the room.
This way, you’re not interrupted by the standing waves (which are boosted waves of certain frequencies), and you’re also not facing a bunch of reflections.
Step #3: Keep 10-40 inches between the mic & the guitar
The distance you keep from the microphone has a massive effect on the low frequencies of the guitar.
The further away you go from the microphone, the less boomy and muddy it will sound.
But don’t go too far away because if you do, you might lose the power and the body of the guitar.
Usually, it’s excellent to keep about 10-40 inches away from the microphone, but it’s best if you try and experiment with different ranges.
Step #4: Stay away from the sound-hole
Another super important thing is to stay away from the sound-hole of the guitar. This is a mistake I see beginners make all the time, and it’s a shame since it’s a really easy thing to fix that makes a huge difference.
What you should do instead is place the mics at the side of the guitar. A commonplace to start from is the 12th fret.
Step #5: Set the height of the mic correctly
The microphone height also determines the sound of the guitar in recordings.
Basically, as you lower the microphone, you increase both the high frequencies and the bass response.
So, to get bright recordings with a strong bass response, place the microphone at the height of the sound-hole (keep it pointing at the sides though).
And, to get recordings with a dominant mid-range, place the microphone above the guitar.
The Ultimate Secret For Clean & Balanced Acoustic Guitar Recordings
So, you’ve edited, equalized, panned, compressed, and have done everything that professionals do to make their guitars sound good. However, there’s still a missing piece.
That missing piece is the way that you maintain play your guitar! What do I mean by that? Well, let me explain.
Usually, all new & experienced guitar players play their guitar in a very stiff way which then prevents them from having a balanced sound.
You can seriously spend hours changing the placement of the mics, editing, mixing, and whatnot, however, if you don’t get this right none of it will matter.
So how do you get this right?

The answer might be even simpler than you might think! All you have to do is essentially two things.
- Setup your guitar correctly – this includes changing your strings, and making sure that they’re connected in a way that doesn’t make them too tight. Some people like tuning their guitar half a tone down as it really looses the strings.
- Try to play as softly as you can – At the beginning, your instincts would usually be to play in a stiff way that may be unpleasant without you even noticing.
Therefore, I would suggest playing as softly as you possibly can until you learn how to control it.
Just by doing this you’ll hear such a change that’ll make you wonder why you didn’t do that up until now.


![How To Mix Your Beats In 6 Steps! [With Examples]](https://wealthysound.com/wp-content/uploads/2020/11/How-To-Mix-Your-Beats-In-6-Easy-Steps-Thumbnail-768x504.png)


