Applying EQ to your master track can fix resonance issues, and help you to bring the most out of your tracks in the areas that matter.
You can apply EQ in both the mixing and mastering stages in lots of different ways, and we’ll look at a few below.
Why Is EQing Your Master So Important?
Applying EQ as part of your mastering process is a really valuable tool. It can allow you to get way more out of your mastering process, and it’s a huge help in finalizing your tracks and getting more of a sense of coherence across a body of work.
In this post, I’ll be discussing EQing a master track both from the perspective of a mastering engineer, and also from a mix engineer, of adding an EQ to the master bus or stereo out whilst in the mixing stages.
Different mix and mastering engineers have different approaches with their EQ, but it’s not uncommon to apply an EQ on the stereo out throughout the entire mix process.
One approach is often to boost the highs or lows on a master, through an EQ that can do this particularly well, rather than boosting each individual channel.
The human ear is really great at adapting to different sounds. Initially whilst you’re mixing or mastering, you might set out in a certain direction to achieve a type of sound – for example a dark-sounding mix with punchy bass.
After a while, your ears can become accustomed to the sound world you’ve created, even if it isn’t as dark as you’d intended, it begins to sound comfortable, and changes to the EQ of the mix can sound abrupt and jarring. This is one occasion where applying EQ to a master track can be really beneficial.
Another reason to EQ your master is to fix any resonances or problematic frequencies.
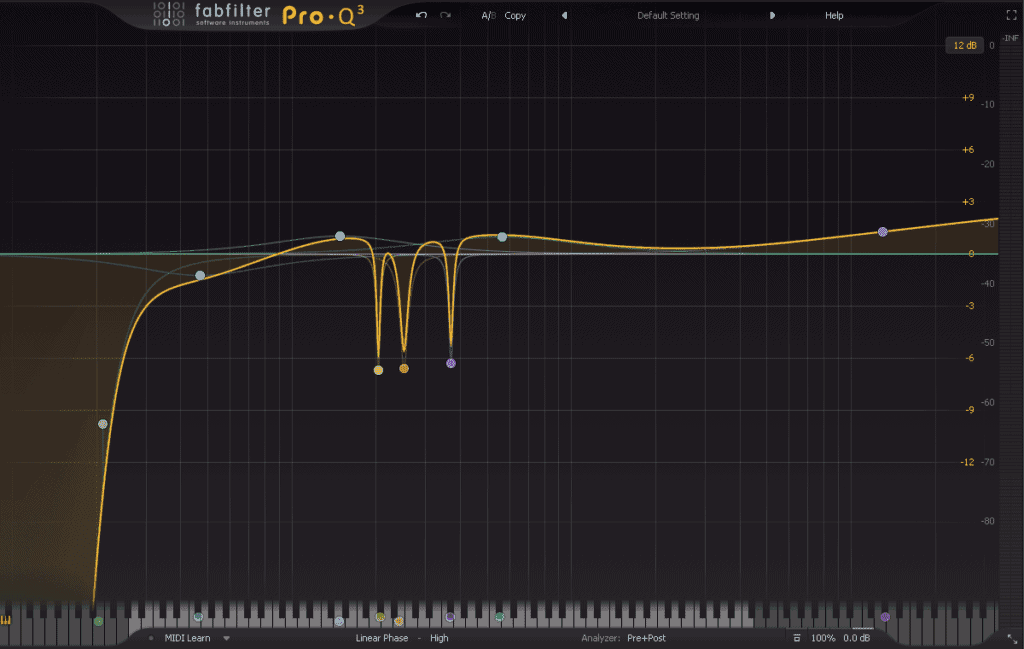
This is usually done by applying a narrow bandwidth to a parametric EQ, and subtracting a couple of dB at the frequency in question.
A similar approach is commonly completed on a dynamic EQ plugin too.
A dynamic EQ allows the chosen EQ reduction to only come into play when a certain threshold is met, so if there are certain areas of a song that need the EQ applying and others that don’t, a dynamic EQ is a great solution.
How To EQ Your Master Track
Step #1: Learn the difference between all types of EQs
First and foremost, it’s important to learn the differences between different types of EQ, and how each can be used differently on your master track. It’s really common to see a multitude of different EQs used on a master track, and each has its own strengths and weaknesses.
Linear Phase EQ

Linear phase EQ is common to see used when applying EQ to a master, and most DAWs have a linear phase EQ built-in. 3rd party plugins like the Fabfilter Pro-Q also have a linear phase mode.
Linear phase means that when the equalization is applied, it will not affect the phase relationship of the source.
This prevents what is known as phase smear. Phase smear can occur in regular EQs (known as minimum phase EQs), due to not all frequencies being processed at the same speed, causing latency in certain frequencies. This can in turn cause undesirable artifacts in the signal.
Phase smear is not always a negative, and a lot of the time the effects of analog, minimum phase EQs can be desirable.
A lot of great-sounding music was made before linear phase EQs came into existence for example. Nowadays though, it’s a popular approach to use linear phase EQ on a master channel, as not to change the rest of the frequencies within the track.
Graphic EQ

Another EQ that can often be seen on the master output – though admittedly less so nowadays, is a graphic EQ. Graphic EQs display certain amounts of frequencies in order and don’t usually have a bandwidth control, instead just having a gain.
Having a graphic EQ on a master output is very common in live sound, and sometimes makes the transition over to studios too. With the rise in “in the box” mastering, this is becoming less common.
In both mixing and mastering, it’s common for engineers to boost some frequencies on the master channel, and this is often done with a Pultec EQP-1A.
The EQP-1A is an EQ that is capable of boosting in a very musical way and is often cited as creating a warmer-sounding track. Boosting the high-end especially is very common.
In mastering, applying subtractive EQ is also incredibly common, and probably one of the most important parts of your mastering chain.
With mastering, it’s important to remember that the goal is merely to enhance the track, and rarely to make any drastic changes to it.
Using a reference track when mixing and mastering is a really important process, and it can help you to immediately compare your own track to a pre-existing song within the genre for example.
This can help inform your decisions with regards to EQ, but also with regards to loudness.
Step #2: Use A Reference Track To EQ Your Master Track
There are some excellent plugins to use for reference tracks, and one such example is ADPTR Audio’s Metric AB. This plugin allows you to instantly compare your mix with any other track instantly (up to 16 at once), and listen in a variety of different formats.
After you’ve chosen your reference track, all you have left to do is eq your track so it’s more similar to the reference track.
Tips For Your Master EQ
Tip #1: Treat Your Room Acoustically Before You EQ

Room treatment and listening environment is always the most important thing when it comes to applying EQ to a master.
If your room is not acoustically treated, and you aren’t listening in a controlled environment, it’ll be almost impossible to make an informed decision.
It’s also fundamental to listen in different ways and at different volumes. Bass will translate differently at lower volumes, and if you’ve been listening too loudly, it’s easy to end up with more mid-range content.
Switching between listening on monitors and on headphones is useful in the same way too.
Tip #2: Start By Cutting Instead Of Boosting

Cutting frequencies rather than boosting is a really important place to start. Subtractive EQ is your best friend, and often it’s a much more effective tool to bring out certain frequencies than boosting those frequencies can be.
For example, if more clarity in the top end is needed, sometimes removing information from the lower end of the frequency spectrum can be the best way to achieve this.
It’s really rare in mastering that an adjustment of more than about 3 or 4dB is necessary, so if that is the case, then it might be a problem that should be sorted in the mixing process rather than mastering.
Tip #3: Use Mid/Side EQs

Mid/Side EQs can be another great approach when mastering. This is a type of EQ that splits your frequency content into the middle and the sides.
This allows you to make changes to the two areas separately and can be great for getting more stereo width, or for boosting the level of certain central frequencies, like the vocal for example.
Tip #4: Don’t Be Afraid To Be Creative
If you’re only just getting started applying EQ to your masters, feel free to experiment. It’ll take time to get the hang of it, and it’s always important that you feel free to be creative.
Keep applying changes, and remember to double-check the sound with the plugins turned on and off, or the EQ inserted and not inserted. At the end of the day, if it sounds better on than off – you’ve done a great job.


